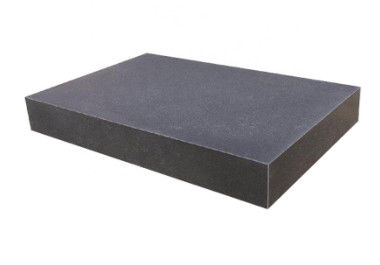
Flatness Granite Working Table Instruments Measuring Table
Granite Surface Plates are used for precision gauging, inspection, layout and marking purposes.
They are preferred by Precision Tool Rooms, Engineering Industries and Research
Laboratories because of their following outstanding advantages.
No rust, no corrosion, relatively warp-free, no compensating hump when nicked,
longer wear, smoother action, greater precision, non magnetic, less care after
commissioning, lower co-efficient of thermal expansion and non glaring surface.
The advantages are high precision, no static electricity, durability, high measurement accuracy. The shape of the working surface includes rectangles, squares, circles, etc. Besides, V-shaped, T-shaped, U-shaped grooves, dovetail grooves, round holes, long holes, etc. These also can be machinable. It is a flat reference measuring tool for workpiece, equipment inspection, scribing, assembly, welding, assembly, and riveting.
Feature
Proportion,2970-3070kg/m3
Compression strength,245-254kg/mm2
Flexible grinding capacity,1.27-1.47N/mm2
Coefficient of linear expansion,4.6×1-6°C
Water absorption 0.13%
Shore hardness HS, more than 70.
Our granite surface plate refers to the advanced standards of the leading countries, and its flatness tolerance is in accordance with the JB/T 7975-1999 Surface Plate:
Grade 000 =1x(1+d/1000)/μm
Grade 00 =2x(1+d/1000)/μm
Grade 0 =4x(1+d/1000)/μm
Grade 1 =8x(1+d/1000)/μm
(d is the length of the diagonal)
|
Specification
Length × Width × Thickness (mm)
|
Weight (kgs)
|
Precision Grade (μm)
|
|
000
|
00
|
0
|
1
|
|
300 × 200 × 50
|
17
|
1.5
|
3
|
6
|
12
|
|
300 × 300 × 50
|
19
|
1.5
|
3
|
6
|
12
|
|
400 × 300 × 70
|
25
|
1.5
|
3
|
6
|
12
|
|
400 × 400 × 70
|
48
|
2
|
3.5
|
6.5
|
13
|
|
630 × 400 × 100
|
76
|
2
|
3.5
|
7
|
14
|
|
630 × 630 × 100
|
155
|
2
|
4
|
8
|
16
|
|
800 × 500 × 130
|
156
|
2
|
4
|
8
|
16
|
|
1000 × 630 × 130
|
284
|
2.5
|
4.5
|
9
|
18
|
|
1000 × 750 × 150
|
338
|
2.5
|
5
|
9
|
18
|
|
1000 × 1000 × 150
|
450
|
2.5
|
5
|
10
|
20
|
|
1600 × 1000 × 200
|
963
|
3
|
6
|
12
|
24
|
|
2000 × 1000 × 200
|
1200
|
3.5
|
6.5
|
13
|
26
|
|
1600 × 1600 × 300
|
2312
|
3.5
|
6.5
|
13
|
26
|
|
2000 × 1600 × 300
|
2890
|
3.5
|
7
|
14
|
28
|
|
2500 × 1600 × 300
|
3612
|
4
|
8
|
16
|
32
|
|
3000 × 2000 × 500
|
9030
|
4.5
|
9
|
18
|
36
|
|
4000 × 2000 × 500
|
12040
|
5.5
|
11
|
22
|
44
|
|
6000 × 2000 × 700
|
25284
|
7.5
|
15
|
30
|
60
|
FAQ
1.Are you a manufacturer?
Yes, we are in this line for 15 years,we do best quality and after service for all clients.
2.Do you have your designing team?
Yes,there are 4 people in our designing team.
3.Do you have free sample?
Yes ,we can send the small sample that you need,the small sample can be free,but the shipping freight will be paid by you.
4.Can you ensure the lead time?
All size of our products is in stock,so please take easy and we can let the goods reach you on time.
5.Do you supply after-service?
For all goods, we can supply for after-service for 3 years,and you can call us at any time that you want.
Thanks for your attention on our measuring tools.
If you have any questions,please leave me the message on the end of this page .
Please chat with me directly ,because I will be always online.


 Your message must be between 20-3,000 characters!
 Please check your E-mail!
  Your message must be between 20-3,000 characters!
 Please check your E-mail!

